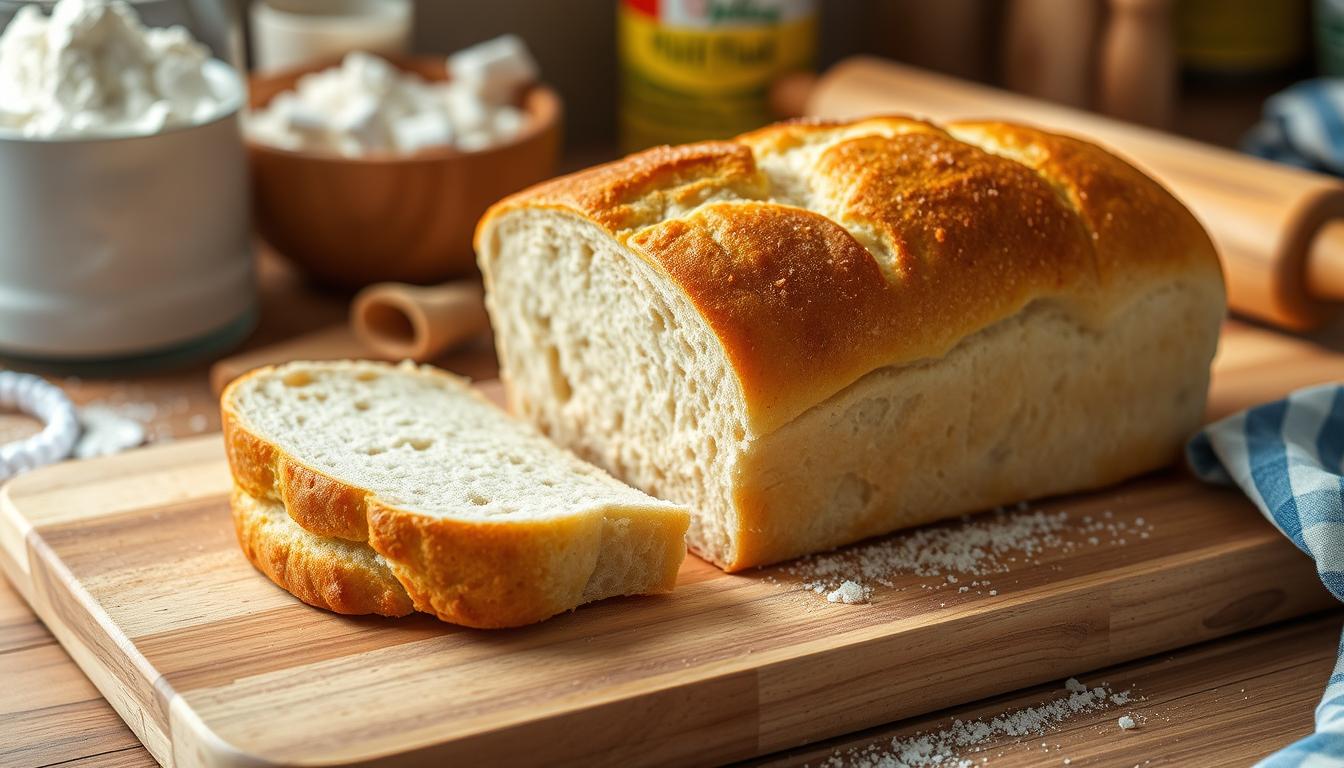
The smell of fresh bread in your kitchen is a joy. Imagine biting into soft, fluffy homemade sandwich bread. It’s perfect for your favorite fillings. This easy recipe lets you make your own delicious loaf without complicated steps.
Table of Contents
Key Takeaways
- Homemade sandwich bread is easy to make with just a handful of basic ingredients.
- The recipe yields a soft, fluffy loaf perfect for sandwiches, toast, or enjoying on its own.
- The bread can be stored at room temperature for up to 3 days or frozen for longer preservation.
- This recipe is ideal for both beginner and experienced bakers, with clear instructions and simple steps.
- Customizable with additional ingredients or toppings to suit your personal preferences.
Essential Ingredients for Perfect Homemade Sandwich Bread
To make the perfect homemade sandwich bread, start with the right ingredients. You’ll need unbleached all-purpose flour or bread flour, active dry yeast or instant yeast, and sugar or honey. Also, warm water, salt, and melted butter are crucial. For extra flavor, try using milk instead of water.
Types of Flour and Their Effects
The flour you pick affects your bread’s texture and structure. All-purpose flour is versatile, while bread flour makes the bread chewier. Whole wheat flour adds a nutty taste but changes the dough’s moisture level.
Understanding Yeast Varieties
Yeast is key for your bread’s rise. You can use active dry yeast or instant yeast. Active dry yeast needs to be proofed in warm water first. Instant yeast goes straight into the dry ingredients.
Additional Key Components
- Sugar or honey: These feed the yeast, helping the bread rise and taste better.
- Salt: It boosts the flavor and controls fermentation.
- Melted butter or olive oil: These fats make the bread soft and moist.
Choosing and using these ingredients well will help you make a homemade sandwich bread. It will be soft, flavorful, and great for your favorite fillings.
Required Tools and Equipment
Making the perfect homemade sandwich bread needs the right bread baking tools and sandwich bread equipment. To bake successfully, you’ll want to have these key items:
- A stand mixer with a dough hook attachment, like the KitchenAid, makes kneading and mixing easy.
- Use high-quality 9×4 inch loaf pans, such as Jamie Oliver’s non-stick ones, for the perfect shape.
- A metal bench scraper helps with dough handling and shaping.
- Dough bowl shower caps or reusable plastic covers keep the dough safe while it rises.
- Rubber spatulas are great for mixing ingredients and scraping the bowl’s sides.
These bread baking tools and sandwich bread equipment are crucial for making tasty homemade sandwich bread. Quality tools make your baking journey rewarding and successful.
“The right tools can make all the difference in the kitchen, especially when it comes to bread baking.”
Having the right equipment makes bread-making easier and helps you get a perfect loaf every time. Look for tools that fit your baking style and needs.
The Science Behind Bread Making
Making the perfect homemade sandwich bread is an art. It needs a deep understanding of bread making science. At its core is gluten development, key to your bread’s structure and texture.
Gluten Development Process
Gluten, a protein in wheat flour, makes bread elastic and chewy. Kneading the dough strengthens gluten strands. This lets the bread rise and keep its shape while baking.
Proofing and Fermentation
The rising and fermenting stages are vital for flavor and texture. During proofing, yeast eats sugars, making carbon dioxide and alcohol. This makes the dough rise and improves its smell and taste.
Temperature Control Tips
Keeping the right temperature is key in bread making. The best proofing temperature is 75-100°F (24-38°C). This helps yeast work well and dough rise. But, over 120°F (50°C) stops yeast activity and dough rising.
Using cold fermentation, letting dough rise in the fridge, boosts flavor and quality. This method enhances your homemade bread.
“The science of bread making is a delicate balance of ingredients, temperature, and time – master these elements, and you’ll be rewarded with a loaf that’s truly worthy of your table.”
Step-by-Step Mixing and Kneading Process
Making homemade sandwich bread starts with the right bread kneading techniques and dough mixing. First, mix all dry ingredients like flour, yeast, salt, and seasonings in a stand mixer bowl. Then, add warm water and wet ingredients like honey or oil slowly. Let the mixer knead the dough for about 10 minutes.
Without a stand mixer, knead by hand for 15-20 minutes. The goal is to knead until the dough can be stretched thin without tearing. This means the gluten is fully developed, leading to a tall, well-structured loaf.
- Combine all dry ingredients in a stand mixer bowl.
- Gradually add warm water and any other wet ingredients.
- Knead the dough for about 10 minutes using a stand mixer or 15-20 minutes by hand.
- The dough should pass the windowpane test, stretching thin without tearing.
When the dough becomes smooth and elastic, not sticking too much, it’s time for the first rise. Proper bread kneading techniques and dough mixing process are key for perfect homemade sandwich bread.
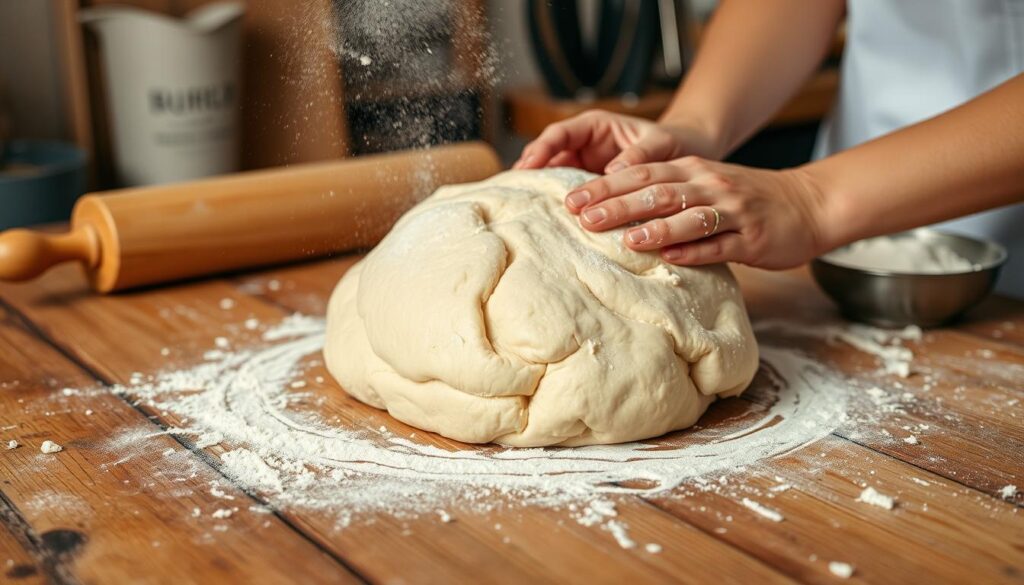
“Kneading the dough is a crucial step in the bread-making process, as it develops the gluten strands that give the bread its structure and chew.”
First Rise and Dough Development
Mastering the first rise is key to making perfect homemade sandwich bread. This stage lets the dough double in size, enhancing its flavor and structure. Watch closely for visual signs to ensure it rises just right.
Visual Cues for Perfect Rising
Look for a few signs when the dough rises. It should spring back slowly when gently pressed, leaving a small dent. If it springs back fast, it needs more time. Overproofed dough will look flat and deflated.
Timing and Temperature Considerations
The first rise usually takes about 1 hour at room temperature. But, your kitchen’s temperature can change this. Warmer places make it rise faster, while cooler ones slow it down. Keep an eye on it and adjust as needed for the perfect rise.
“The temperature and humidity of your kitchen can significantly impact the rise time of your dough. Keep a close eye on it, and be prepared to adjust the proofing duration as needed.”
By watching for visual cues and adjusting for temperature, you can get your bread dough to rise perfectly. This sets the stage for a deliciously developed loaf.
Shaping Techniques for Professional-Looking Loaves
Making a homemade sandwich loaf that looks great is all about dough shaping. After it rises, you need to shape it into a masterpiece. A few simple techniques can make it look like it came from a bakery.
Begin by stretching the dough into a rectangle, matching your loaf pan’s size. Roll it loosely like a Swiss roll, not tightly. This lets it rise well during the second proofing.
Put the dough seam-side down in your pan. This makes the crumb even and the loaf look polished. Don’t overwork the dough to keep its delicate texture.
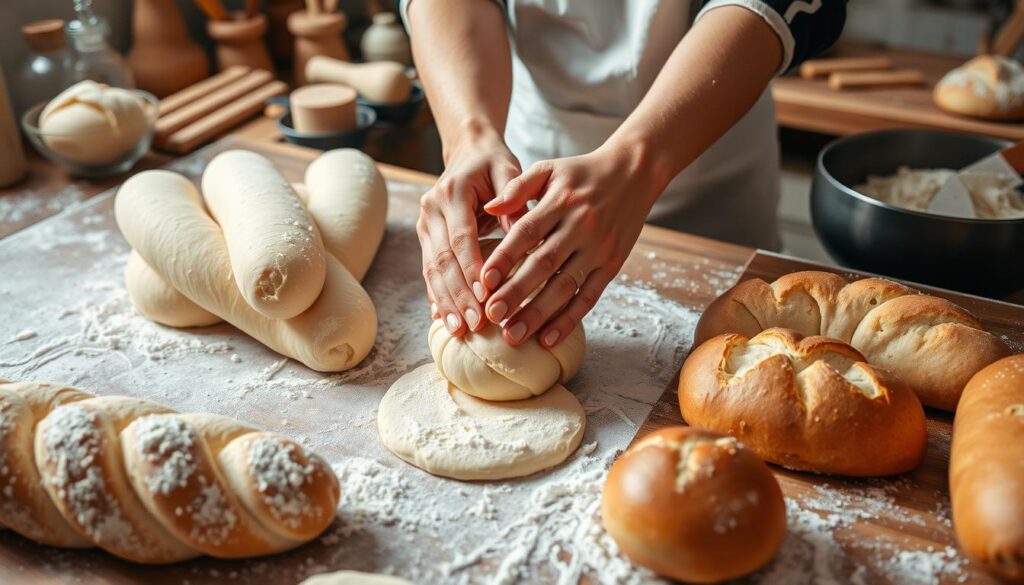
The bread shaping process is key for texture and taste. With these techniques, you’ll bake loaves that wow everyone.
Second Rise and Final Proofing Tips
Proofing your bread dough is key in making homemade sandwich bread. This final rise, or second rise, enhances the dough’s structure, flavor, and texture. Knowing when it’s ready and avoiding mistakes can lead to a light, airy loaf.
Signs of Proper Proofing
The second rise should last about 45-60 minutes. The dough is ready when it’s 1/2-inch above the loaf pan. Check by gently pressing it; it should spring back slowly, showing it’s ready.
Common Proofing Mistakes
- Overproofing: Too long and the dough becomes dense. Watch it closely and don’t let it rise too high.
- Underproofing: Not enough time makes the bread heavy. Give it enough time for the yeast to work.
Keeping the temperature steady is crucial. Avoid big changes in temperature, as they can mess up the yeast’s work. Aim for a temperature of 75-85°F (24-29°C) for the best results.
“The secret to perfect bread proofing is temperature control and patience. Don’t rush the process – let the dough rise at its own pace for the best texture and flavor.”
By using these bread proofing techniques and watching for visual signs, you’ll get a beautifully risen, light, and airy final dough rise for your homemade sandwich bread.
Baking Methods and Temperature Control
To make the perfect homemade sandwich bread, you need to control the temperature well. Start by preheating your oven to 375°F (190°C). This temperature helps get a crispy crust and a soft inside.
When it’s time to bake, put your shaped loaves in the oven. Set the timer for 25-30 minutes. Rotate the pans halfway through to ensure even browning. Watch the loaves closely as baking time can change based on oven size and loaf size.
To see if the bread is done, tap its top. It should sound hollow, meaning it’s at the right temperature of 190°F (88°C). An egg wash before baking can make the crust softer and more vibrant.
Temperature control is key from start to finish in bread making. Focus on these details to get professional-quality sandwich bread for your next meal.
“The key to a perfect loaf of homemade bread is temperature control. Get it right, and you’ll be rewarded with a light, fluffy texture and a golden-brown crust that’s simply irresistible.”
| Bread Baking Technique | Ideal Temperature |
|---|---|
| Proofing Yeast | 110°F – 130°F (43°C – 54°C) |
| Fermenting Dough | 85°F – 90°F (29°C – 32°C) |
| Baking Lean-Dough Breads | 190°F – 210°F (88°C – 99°C) |
| Baking Enriched-Dough Breads | 180°F – 190°F (82°C – 88°C) |
By using the right bread baking techniques and oven temperature for bread, you’ll make perfect homemade sandwich bread. Your family and friends will love it.
Conclusion: Enjoying Your Freshly Baked Bread
Congratulations on making your own homemade sandwich bread! Your loaf is now perfectly baked. Let it cool completely before slicing for the best taste and texture.
Your freshly baked bread is ready to be enjoyed in many ways. Use it for tasty sandwiches, toast it for a crispy breakfast, or serve it with soups and stews. Making your own bread from scratch is rewarding, offering better taste and quality than store-bought.
Whether you enjoy your bread right away or save it for later, you should be proud. This bread’s versatility makes it a great addition to your cooking. It can make any meal special with its homemade flavor and texture.
FAQ
What is the yield of this homemade sandwich bread recipe?
This homemade sandwich bread recipe yields a perfect, soft, and fluffy loaf.
How simple is the recipe and how long does it take to make?
The recipe is simple, using only five ingredients. It takes about 3 hours from start to finish.
What is the ideal use for this homemade sandwich bread?
The bread is ideal for sandwiches, dipping in soups, or enjoying on its own.
How long can the homemade sandwich bread be stored?
The bread can be stored at room temperature for up to 3 days. It can also be frozen for up to 1 month.
What are the key ingredients in this homemade sandwich bread recipe?
Key ingredients include unbleached all-purpose flour or bread flour, active dry or instant yeast, sugar or honey, warm water, salt, and melted butter. Whole wheat flour can be used with adjusted hydration. Milk can substitute water for a richer flavor. European butter with higher fat content, like Kerrygold, is recommended for optimal texture and taste.
What essential tools are required for making this homemade sandwich bread?
Essential tools include a stand mixer with dough hook attachment, 9×4 inch loaf pans, metal bench scraper, dough bowl shower caps, and rubber spatulas. A KitchenAid stand mixer is recommended for its versatility in bread making and other baking tasks. High-quality loaf pans, like Jamie Oliver’s non-stick pans with high sides, are crucial for achieving the perfect sandwich bread shape.
Why is gluten development crucial for this homemade sandwich bread?
Gluten development is crucial for bread structure. Proofing and fermentation occur during rising periods, developing flavor and texture. Temperature control is vital, with ideal proofing temperatures between 75-100°F (24-38°C). Yeast activity stops at 120°F (50°C). Cold fermentation in the refrigerator can enhance flavor development.
How should the dough be mixed and kneaded for best results?
Combine ingredients in a stand mixer, kneading for about 10 minutes or 15-20 minutes by hand. The dough should pass the windowpane test, stretching thin without tearing. Proper kneading ensures gluten development for a tall, well-structured loaf. The dough should form a smooth ball and not stick to the bowl or fingers excessively.
What are the visual cues for the first rise of the dough?
The first rise should double the dough’s size, taking about 1 hour at room temperature. Visual cues include a slow spring back when pressed, leaving a small indent. If the dough springs back quickly, it needs more time. Overproofing can result in a flat, deflated bread. Temperature affects rising time; warmer environments speed up the process.
How should the dough be shaped for the second rise?
After the first rise, stretch the dough into a rectangle, width matching the loaf pan. Roll it loosely into a log, similar to a Swiss roll. Place seam-side down in the prepared pan. This shaping technique ensures an even crumb structure and professional appearance. Avoid rolling too tightly to allow for proper second rise.
What are the signs of proper proofing during the second rise?
The second rise (proofing) should take about 45-60 minutes. The dough is ready when it’s about 1/2-inch above the rim of the loaf pan. Signs of proper proofing include the dough slowly springing back when gently pressed. Overproofing can lead to collapsed loaves, while underproofing results in dense bread. Maintain consistent temperature during proofing for best results.
How should the homemade sandwich bread be baked?
Preheat the oven to 375°F (190°C). Bake for 25-30 minutes, rotating pans halfway through for even browning. The loaves should be golden brown and sound hollow when tapped. An optional egg wash before baking can create a softer crust and enhance browning. Internal bread temperature should reach about 190°F (88°C) when fully baked.
How should the baked homemade sandwich bread be handled and stored?
Allow the bread to cool completely before slicing for best texture. Enjoy your homemade sandwich bread fresh, or store it properly for later use. This versatile bread is perfect for sandwiches, toast, or as a side for soups and stews.
Source Links
- Easy White Sandwich Bread – https://thebusybaker.ca/easy-white-sandwich-bread/
- Easy Soft Sandwich Bread in a Loaf Pan (For Beginners) – https://thepracticalkitchen.com/soft-sandwich-bread/
- Classic Sandwich Bread – https://www.kingarthurbaking.com/recipes/classic-sandwich-bread-recipe
- Easy Sandwich Bread: Simple Recipe for Homemade Bread – https://www.thequickjourney.com/easy-sandwich-bread/
- Soft White Sandwich Bread – I Cook And Paint – https://icookandpaint.com/soft-white-sandwich-bread/
- Homemade Soft Sandwich Bread – Lion’s Bread – https://www.lionsbread.com/perfect-soft-sandwich-bread-recipe/
- After Baking More Than 100 Loaves, These Are the Tools I Swear by for Amazing Homemade Bread – https://www.foodandwine.com/cooking-techniques/baking/bread-baking-tools
- How Bread Works – https://science.howstuffworks.com/innovation/edible-innovations/bread.htm
- Ultimate Guide to Homemade Bread – https://thestayathomechef.com/homemade-bread/
- Bite into Science: How Bakery Enzymes are Revolutionizing Bread – Infinita Biotech – https://infinitabiotech.com/blog/bite-into-science-how-bakery-enzymes-are-revolutionizing-bread/
- Sandwich Bread – https://baranbakery.com/sandwich-bread/
- Easy Sandwich Bread (Baking Bread For Beginners ) – Savas Kitchen – https://savaskitchen.com/easy-sandwich-bread-baking-bread-for-beginners/
- Sandwich Bread (VIDEO) – bakecookrepeat.com – https://bakecookrepeat.com/recipe/sandwich-bread/
- The PERFECT Sandwich Bread! – https://thesaltedpepper.com/homemade-sandwich-bread/
- Soft Sourdough Sandwich Bread – https://littlespoonfarm.com/soft-sourdough-sandwich-bread-recipe/
- The Ultimate Guide to Shaping Bread Dough | The Perfect Loaf – https://www.theperfectloaf.com/guides/shaping-bread-dough/
- How to Shape a Pan Loaf (Sandwich Bread) | The Perfect Loaf – https://www.theperfectloaf.com/guides/shaping-a-pan-loaf/
- Soft and Fluffy White Bread Loaf – https://cloudykitchen.com/blog/white-bread-loaf/
- The Ultimate Guide to Proofing Bread Dough | The Perfect Loaf – https://www.theperfectloaf.com/guides/proofing-bread-dough/
- Soft and Fluffy Sandwich Bread Recipe: Your Guide to Perfect Homemade Loaves – https://generationacresfarm.com/soft-and-fluffy-sandwich-bread-recipe-your-guide-to-perfect-homemade-loaves/
- Homemade Bread: Temperature Is Key – https://blog.thermoworks.com/homemade-bread-temperature-is-key/
- Country White Sandwich Bread, Best White Bread I Baker Bettie – https://bakerbettie.com/country-white-bread/
- Super Soft Whole Wheat Sandwich Bread in Your Bread Machine – https://justmillit.com/whole-wheat-super-soft-bread-machine-recipe/
- Artisan Bread in Five Minutes a Day – https://artisanbreadinfive.com/


